前端shiro主题配置教程
前提要求:
● 你已安装 Mix Space 后端并且已启动
● 已注册 Vercel 和 GitHub 账号
设置主题配置:
进入 Mix Space 后台,进入「配置与云函数」页面,点击右上角的新增按钮,在编辑页面中,填入以下设置:
名称:shiro
引用:theme
数据类型:JSON
内容:
{
  "footer": {
    "otherInfo": {
      "date": "2020-{{now}}",
      "icp": {
        "text": "萌 ICP 备 20236136 号",
        "link": "https://icp.gov.moe/?keyword=20236136"
      }
    },
    "linkSections": [
      {
        "name": "关于",
        "links": [
          {
            "name": "关于本站",
            "href": "/about-site"
          },
          {
            "name": "关于我",
            "href": "/about"
          },
          {
            "name": "关于此项目",
            "href": "https://github.com/innei/Shiro",
            "external": true
          }
        ]
      },
      {
        "name": "更多",
        "links": [
          {
            "name": "时间线",
            "href": "/timeline"
          },
          {
            "name": "友链",
            "href": "/friends"
          },
          {
            "name": "监控",
            "href": "https://status.innei.in/status/main",
            "external": true
          }
        ]
      },
      {
        "name": "联系",
        "links": [
          {
            "name": "写留言",
            "href": "/message"
          },
          {
            "name": "发邮件",
            "href": "mailto:i@innei.ren",
            "external": true
          },
          {
            "name": "GitHub",
            "href": "https://github.com/innei",
            "external": true
          }
        ]
      }
    ]
  },
  "config": {
    "color": {
      "light": [
        "#33A6B8",
        "#FF6666",
        "#26A69A",
        "#fb7287",
        "#69a6cc",
        "#F11A7B",
        "#78C1F3",
        "#FF6666",
        "#7ACDF6"
      ],
      "dark": [
        "#F596AA",
        "#A0A7D4",
        "#ff7b7b",
        "#99D8CF",
        "#838BC6",
        "#FFE5AD",
        "#9BE8D8",
        "#A1CCD1",
        "#EAAEBA"
      ]
    },

    "bg": [
      "https://github.com/Innei/static/blob/master/images/F0q8mwwaIAEtird.jpeg?raw=true",
      "https://github.com/Innei/static/blob/master/images/IMG_2111.jpeg.webp.jpg?raw=true"
    ],
    "custom": {
      "css": [],
      "styles": [],
      "js": [],
      "scripts": []
    },
    "site": {
      "favicon": "/innei.svg",
      "faviconDark": "/innei-dark.svg"
    },
    "hero": {
      "title": {
        "template": [
          {
            "type": "h1",
            "text": "Hi, I'm ",
            "class": "font-light text-4xl"
          },
          {
            "type": "h1",
            "text": "Innei",
            "class": "font-medium mx-2 text-4xl"
          },
          {
            "type": "h1",
            "text": "👋。",
            "class": "font-light text-4xl"
          },
          {
            "type": "br"
          },
          {
            "type": "h1",
            "text": "A NodeJS Full Stack ",
            "class": "font-light text-4xl"
          },
          {
            "type": "code",
            "text": "<Developer />",
            "class": "font-medium mx-2 text-3xl rounded p-1 bg-gray-200 dark:bg-gray-800/0 hover:dark:bg-gray-800/100 bg-opacity-0 hover:bg-opacity-100 transition-background duration-200"
          },
          {
            "type": "span",
            "class": "inline-block w-[1px] h-8 -bottom-2 relative bg-gray-800/80 dark:bg-gray-200/80 opacity-0 group-hover:opacity-100 transition-opacity duration-200 group-hover:animation-blink"
          }
        ]
      },
      "description": "An independent developer coding with love."
    },
    "module": {
      "activity": {
        "enable": true,
        "endpoint": "/fn/ps/update"
      },
      "donate": {
        "enable": true,
        "link": "https://afdian.net/@Innei",
        "qrcode": [
          "https://cdn.jsdelivr.net/gh/Innei/img-bed@master/20191211132347.png",
          "https://cdn.innei.ren/bed/2023/0424213144.png"
        ]
      },
      "bilibili": {
        "liveId": 1434499
      }
    }
  }
}
可以自行修改里面的内容!
配置环境变量:
NEXT_PUBLIC_API_URL=API 地址
NEXT_PUBLIC_GATEWAY_URL=Gateway 地址
ENABLE_EXPERIMENTAL_COREPACK=1
API 地址和Gateway 地址请前往后端获取
设定—系统—网站设置—API 地址/Gateway 地址
复制下来替换上面的内容即可!
通过 Vercel 部署
克隆仓库登陆 GitHub 账号
访问 https://github.com/Innei/Shiro
点击右上角的 Fork 按钮,将仓库克隆到你的账号下


打开 Vercel 创建项目
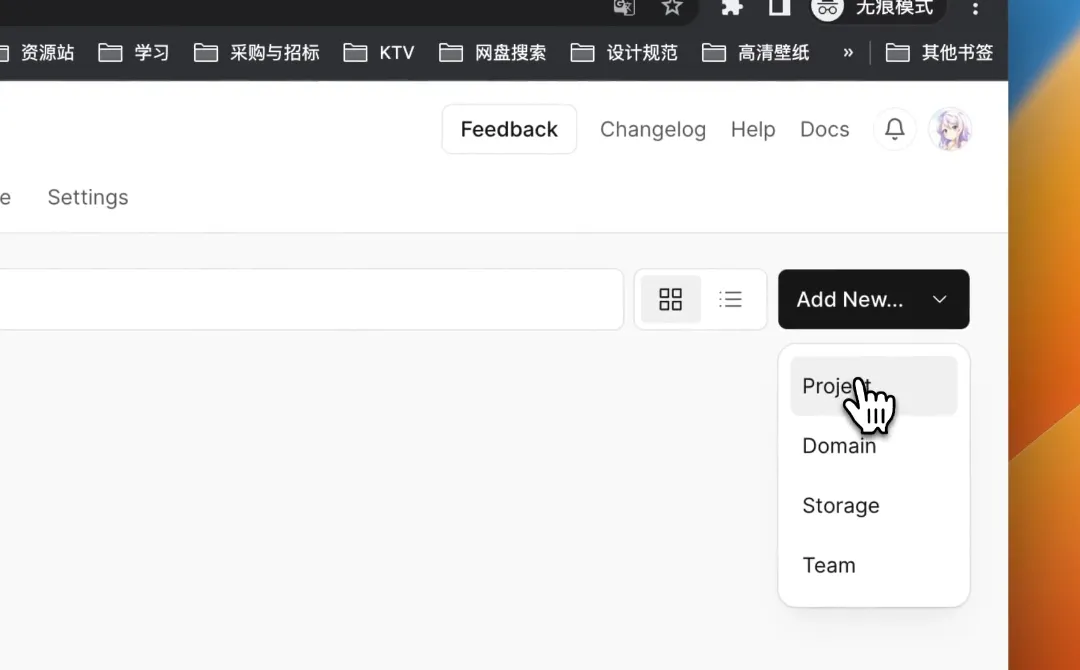
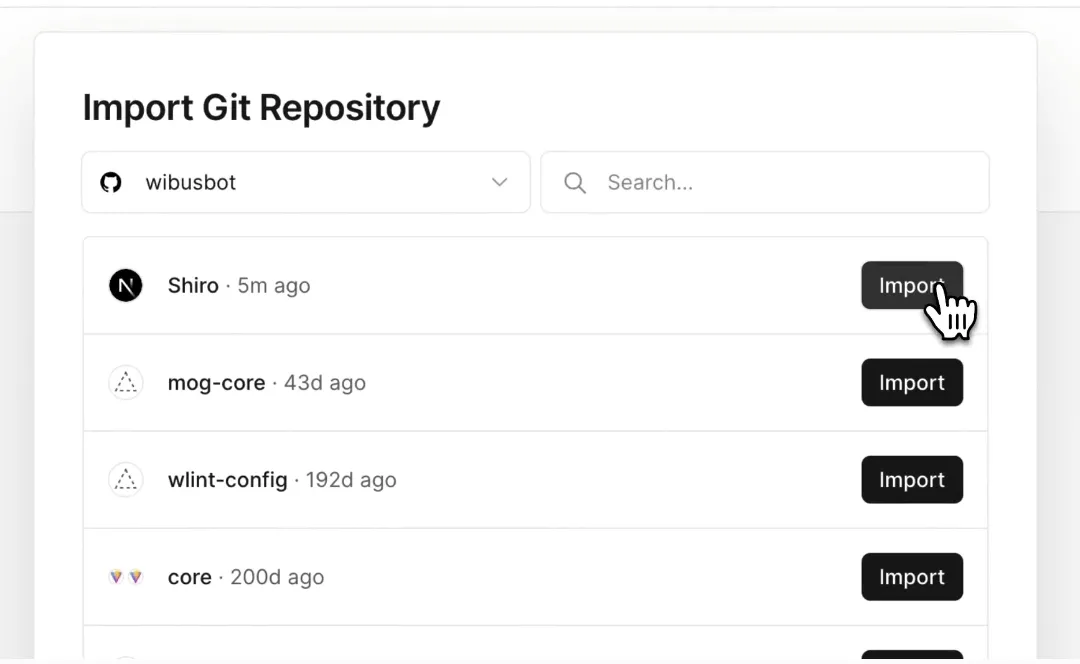
登陆 Vercel 账号,点击右上角的 New Project 按钮,选择 Import Git Repository,选择你刚刚 Fork 的仓库,点击 Import 按钮,即可进入到项目配置页面


键入环境变量 & 开始部署
在刚刚进入的 Vercel 项目配置页面中,点击 Environment Variables,然后键盘上的 Ctrl + V 将环境变量粘贴到输入框中,然后点击 Deploy 按钮,等待部署完成。
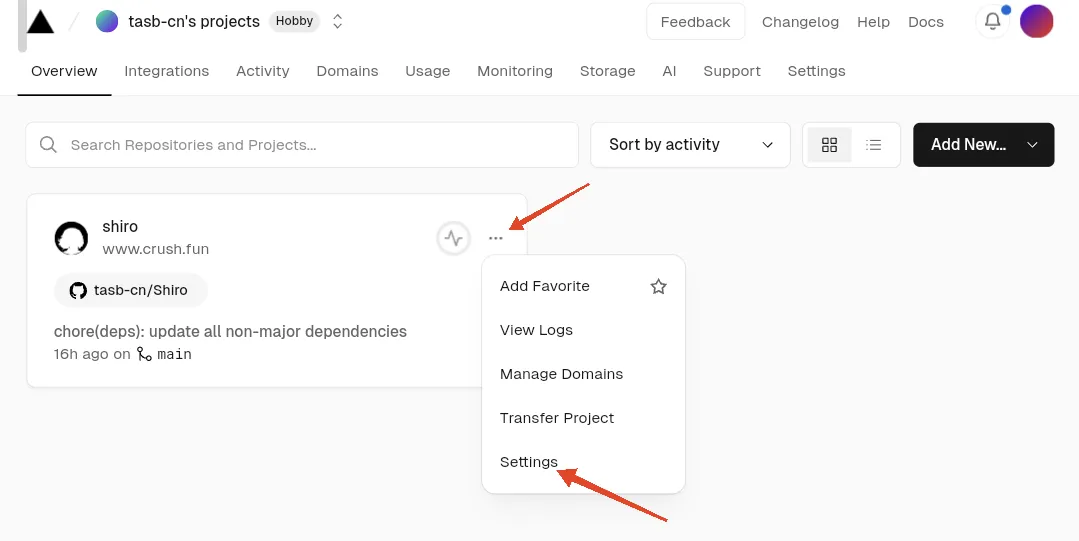
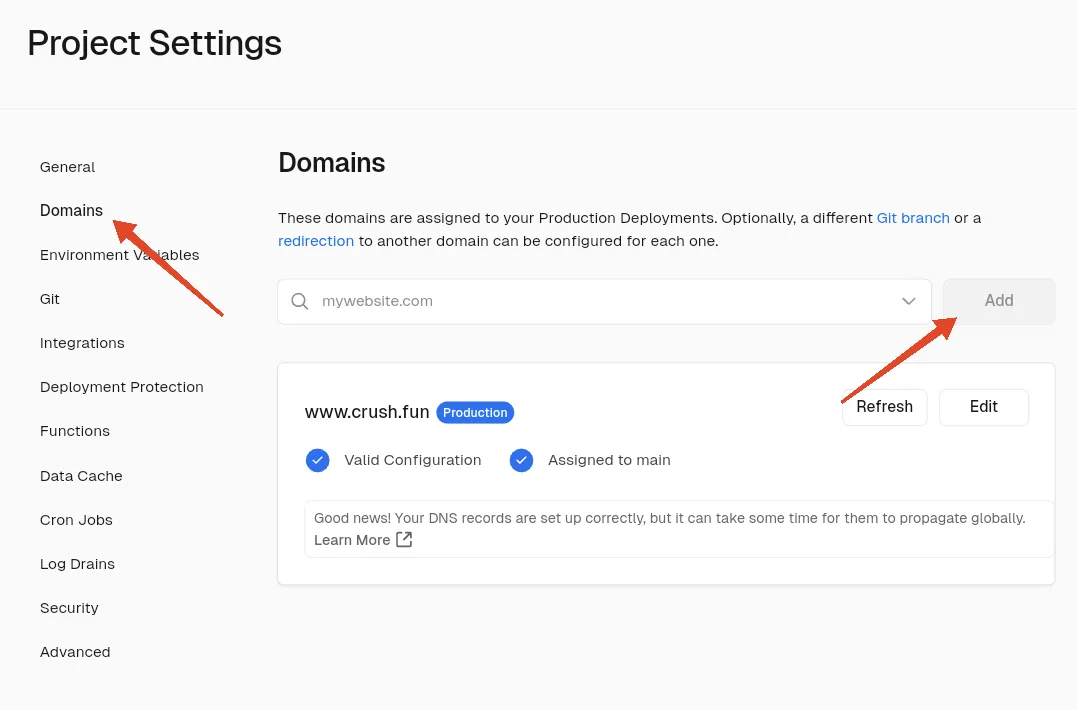
绑定自己的域名:

